Everything I wish someone had told me before I wasted money on the wrong gear and missed the shot.
“The best wildlife photographer is the one who shows up — with the right gear, the right knowledge, and no excuses.”
When I started wildlife photography, I bought the wrong lens first. I chased animals in bad light. I used the wrong camera settings for a moving target and walked away with 200 blurry shots and a bruised ego.
This guide is not a gear review roundup written by someone who skimmed spec sheets. This is what I actually use — the Canon 2000D, the Sony A6400, the GoPro Hero 12 — with real lenses, real budgets, and real advice on when to use what.
If you’re just starting out, this will save you at least ₹20,000 (200 GBP) in bad purchases and months of frustrating trial and error. Read it once, carefully, then go shoot.
My Gear — What It Does and What It Costs
01 / Entry-Level DSLR
Canon EOS 2000D
Your first wildlife body
This is where most beginners should start. The 2000D gives you 24MP resolution, decent autofocus, and a battery that lasts all day. It won’t win a spec war against mirrorless cameras, but it will teach you everything about light, timing, and patience — without draining your bank account. The optical viewfinder is actually a strength here: it gives you a natural, lag-free view of fast-moving animals.
- 24.1MP APS-C sensor — enough detail for large prints
- 9-point AF — works well for stationary or slow subjects
- 500 shots per battery charge — shoots all day
- Lightweight at 475g — you’ll carry this for 8+ hours
Body Only ₹25,000 – ₹32,000
Sony A6400
Upgrade for fast, unpredictable wildlife
The A6400 is where things get serious. Its real-time subject tracking and eye-tracking autofocus are genuinely game-changing for birds in flight, running mammals, and anything that moves without warning. The 425-point phase-detect AF system locks and holds on subjects that the Canon would lose entirely. This is not a beginner camera — but if you outgrow the Canon fast, skip straight to this.
- 24.2MP APS-C with real-time eye and animal AF
- 11fps burst — captures the decisive moment in a sequence
- No in-body stabilisation — you need steady hands or a gimbal
- Weather-sealed body — works in rain and dust
Body Only ₹70,000 – ₹80,000
GoPro Hero 12
Get-in-close, point-of-view footage
The GoPro is not a wildlife camera in the traditional sense. But it earns its place in my bag for one specific use: remote setups and environmental storytelling. I mount it near water holes, animal trails, or on my body while trekking. The 5.3K video, HyperSmooth stabilisation, and waterproofing make it perfect for capturing scenes you physically can’t be part of. Think of it as your second pair of eyes, placed where a normal camera can’t go.
- 5.3K/60fps video — cinematic slow motion possible
- HyperSmooth 6.0 — stabilised even while running or on a vehicle
- Waterproof to 10m — no housing needed
- Voice control — useful when hands are busy
With Accessories Kit ₹38,000 – ₹45,000
Your Lens Choices
Where most of your budget should go
The camera body matters less than your lens. I use three lens setups depending on the situation. The Canon 75–300mm is my everyday telephoto for the 2000D — affordable, lightweight, and good enough for stationary birds and mid-distance mammals. The Canon 10–18mm is my landscape and habitat wide-angle — for shooting the environment the animal lives in, not just the animal. The Sony 200–600mm paired with the A6400 is my serious birding and fast-action setup.
- Canon 75–300mm f/4–5.6 III → ₹30,000 – ₹54,000
- Canon 10–18mm f/4.5–5.6 IS STM → ₹28,000 – ₹42,000
- Sony 200–600mm f/5.6–6.3 G OSS → ₹1,45,000 – ₹1,70,000
₹2,96,000 – ₹3,43,000
This is the full-system cost — two cameras, three lenses, one action cam. If budget is a constraint, start with Canon 2000D + 75–300mm only (₹35,000–₹46,000). Do not buy everything at once. Buy what your current skill level justifies.
Which Lens, When
75–300 mm
General Wildlife
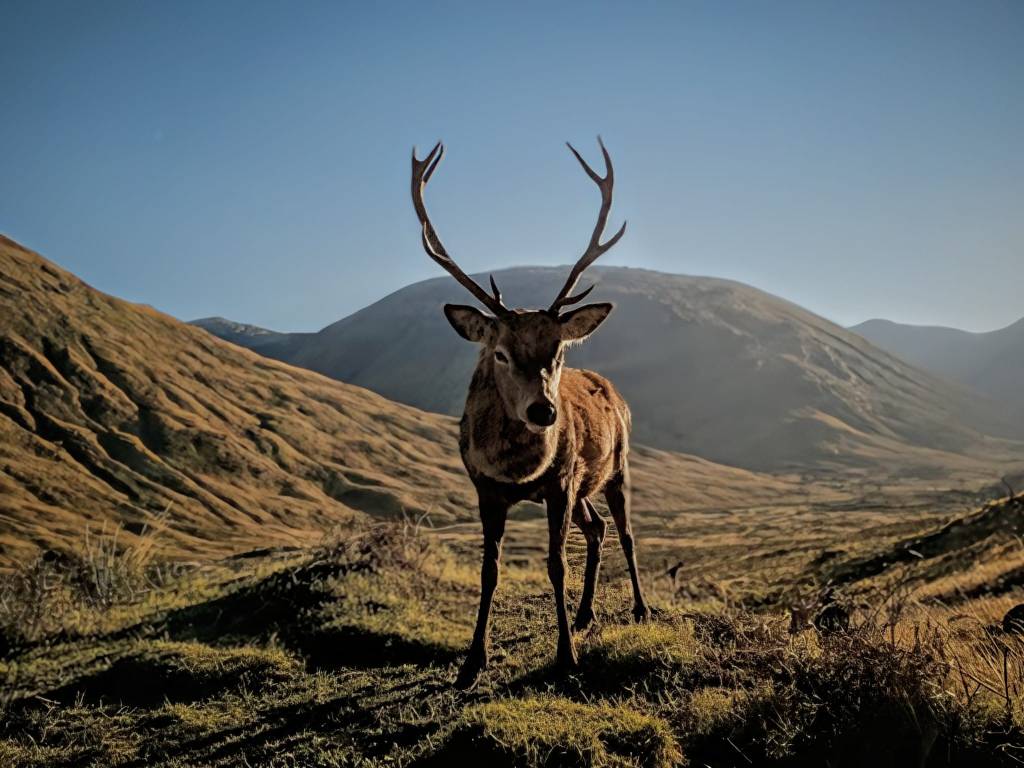
Your go-to for deer, monkeys, reptiles, and sitting birds within 30–80 metres. Lightweight enough to hand-hold for hours. Not sharp wide open — always shoot at f/8 or tighter. Don’t chase birds in flight with this lens. You will miss every shot and get frustrated.
10–18 mm
Habitat & Context
Most beginners ignore wide-angle lenses in wildlife. That’s a mistake. The best wildlife images aren’t just close-up portraits — they show the animal in its environment. Use this when you want to tell the story of where the animal lives, not just what it looks like. Also useful for landscapes at golden hour.
200–600 mm
Birds & Fast Action
This is a serious investment and a serious lens. Paired with the A6400’s real-time tracking, this becomes one of the best birding setups available without spending lakhs more. Expect sharp images of birds in flight, distant mammals, and skittish animals that bolt the moment they spot you. Requires practice to handhold steadily.
Camera Settings That Actually Work
Forget Auto mode the day you decide wildlife photography is serious. Here are the settings I use for the three most common situations. Memorise these. They will become instinct.
Situation Shutter Aperture ISO Stationary animal, good light 1/500s f/7.1 100–400 Bird in flight 1/2000s+ f/6.3 Auto (cap 3200) Early morning / low light 1/400s f/5.6 800–1600 Running mammal 1/1600s f/6.3 Auto (cap 3200) GoPro — trail setup Auto Auto Linear mode ON
On the Canon 2000D, always use Continuous AF (AI Servo) for moving subjects. On the Sony A6400, turn on Real-Time Tracking — tap your subject on the screen and let the camera do the work. The biggest beginner mistake is shooting single-shot AF on a moving animal.
The Exposure Triangle, simplified: Shutter speed stops motion blur. Aperture controls depth of field. ISO controls brightness but adds grain. For wildlife, freeze motion first — then balance the other two. Always shoot RAW if your camera supports it. You will be glad you did in post-processing.
The Non-Negotiables
5 Rules I Follow Every Single Time
Rule 01
Light is the difference between a record shot and a great photo
Shoot in the first two hours after sunrise and the last two hours before sunset. This is non-negotiable. Midday light is flat, harsh, and unforgiving — no camera or lens compensates for bad light. I cancel shoots when the light is wrong. So should you.
Rule 02
Know your subject before you arrive
I research animal behaviour before every shoot. What does this species eat? When is it most active? Where does it drink? A photographer who understands animal behaviour will always outshoot someone with more expensive gear. Position yourself where the animal is going — not where it is right now.
Rule 03
Patience beats persistence every time
Wildlife photography is 80% waiting and 20% shooting. I have sat in one spot for four hours waiting for a bird to return to its perch. The photographers who get the shot are the ones still there when it happens. Chasing animals rarely works. Setting up in the right spot and waiting almost always does.
Rule 04
Get low, get close, get sharp
Most beginner wildlife shots are taken standing upright, from a distance, with a cluttered background. Get down to the animal’s eye level. Close background distance by choosing an angle with more separation. A sharp eye-level portrait with a clean background beats a technically superior shot taken from standing height.
Rule 05
Never disturb the animal for the shot
This is ethics, not preference. Getting close enough to stress an animal, approaching a nesting site, or using calls and bait to force encounters is wrong — and increasingly, it is illegal in protected areas. The best wildlife photographers build images around natural behaviour. If you disturb the animal to get the shot, the shot doesn’t count.
Buying Advice
Start Here, Not There
If your total budget is under ₹50,000: Buy the Canon 2000D body + 75–300mm lens. Nothing else. Learn to shoot with what you have. Most photographers who buy more gear before improving their fundamentals just end up with expensive, underused equipment.
If your budget is ₹80,000–₹1,20,000: Canon 2000D + 75–300mm + 10–18mm + a quality tripod (not cheap — a shaky tripod is worse than no tripod). The wide-angle will open up a completely different style of shooting that most beginners ignore.
If your budget is ₹2,00,000+: Start building toward the Sony A6400 system. The 200–600mm lens is where serious bird photography begins. But only make this jump after you have spent a year with the Canon system and genuinely know you need faster autofocus and more reach.
The GoPro Hero 12 is not a priority purchase. It is a specialist tool. Buy it when you have a specific use case in mind — trail cameras, vehicle mounts, underwater shots — not because it looks exciting in an unboxing video. Most beginners who buy a GoPro for wildlife photography use it twice and leave it in a drawer.
The one accessory most beginners skip: A quality memory card. Use a minimum UHS-I Speed Class 3 (U3) card rated at 90MB/s+. Slow cards cause your camera to freeze mid-burst at exactly the wrong moment. Buy the right card before you need it.

Leave a comment